A surprisingly easy and impactful project you can do in your home is to swap the door hardware. New door knobs and hinges can completely change the way your doors look — and function. Best of all? All you need is a screwdriver to complete this project.
Why You Might Want to Change Your Door Hardware
Style upgrade: Swapping shiny brass for matte black or brushed nickel can instantly modernize a room.
Functionality: Old latches that stick or knobs that spin can finally retire.
Consistency: Matching finishes throughout your home makes everything feel more cohesive.
Security: New hardware can improve the safety of exterior doors.
What You’ll Need
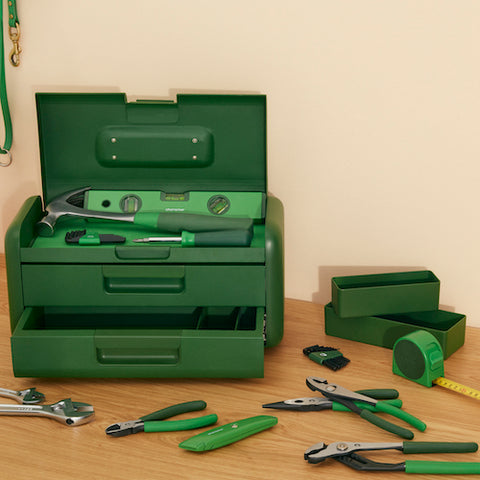
Here’s your basic toolkit for this project:
New doorknob or handle set (with latch and strike plate)
New hinges (optional, but recommended for a matching look)
Screwdriver or drill (with appropriate bits)
Step-by-Step: Changing a Doorknob and Hinges
Step 1: Remove the Old Hardware
Start by unscrewing the interior doorknob with a screwdriver.
Pull both sides of the knob apart and remove them.
Unscrew and remove the latch plate from the edge of the door.
On the door frame, remove the strike plate.
Pro Tip: Keep all screws in a cup or small container so you don’t lose them mid-project.
Step 2: Remove the Hinges
With the door closed, unscrew the hinges from the door frame.
Have a second person hold the door steady, or place something underneath to support it as you unscrew the hinges.
Remove the hinges from the door itself.
Step 3: Check Fit and Prep
Test your new hardware in the existing holes. Most standard hardware is designed to fit common door setups, but if yours doesn’t line up, you may need to fill old holes with wood filler and drill new pilot holes.
If there’s paint built up around the hinges, gently score it with a utility knife before removing the old hinge so you don’t tear the paint or drywall.
Step 4: Install New Hinges
Attach the new hinges to the door first.
Line them up where the old ones were and screw them in tightly.
Carefully lift the door back into place and attach the hinges to the door frame.
Pro Tip: If the door isn’t closing quite right after installation, you may need to adjust the hinge position slightly or use longer screws in the top hinge for better support.
Step 5: Install the New Doorknob
Slide the latch into the hole on the edge of the door, ensuring the angled side faces the direction the door closes.
Attach the knobs or handles on each side, lining up the spindle with the latch mechanism.
Screw everything in place, then test it to make sure it turns and latches smoothly.
Step 6: Attach the New Strike Plate
Screw the new strike plate into the door frame.
Close the door and check the alignment—if the latch doesn’t quite catch, you may need to adjust the strike plate position slightly.
Common Mistakes to Avoid
Not checking the door swing: Make sure your new latch and handles are oriented correctly depending on whether the door opens to the left or right.
Forgetting to support the door: Don’t try to unscrew hinges without something holding the door steady.
Using short screws on exterior doors: For extra security, use longer screws (at least 2.5") in the hinges and strike plate.
What to Do If Your New Doorknob or Strike Plate Doesn’t Fit
Problem: The new doorknob doesn’t fit the existing hole (bore hole). Most interior doors have a standard bore hole size (typically 2 1/8") and backset (either 2 3/8" or 2 3/4"), but some older or custom doors are a little different.
Fixes: Check the backset (the distance from the edge of the door to the center of the hole). Many knobs are adjustable, but if yours isn’t, make sure you buy one with the correct backset. Enlarge the hole using a hole saw attachment on a drill if the new knob is too big for the existing hole. (Use a guide plate to keep things centered.) Use a door lock installation jig—it’ll help line everything up and ensure a clean, accurate hole. If the knob is too small for the hole, you may need to patch and redrill (see below).
Problem: The latch or strike plate doesn’t align with the existing cutout. If the new latch or strike plate doesn’t line up with your existing cutout, the door might not latch properly or may feel loose.
Fixes: Mark the correct position by closing the door and seeing where the latch hits the frame. Use a pencil or a dab of lipstick on the latch to transfer a mark. Chisel out a new mortise if the strike plate or latch plate is a different shape or size. Use a sharp chisel and hammer to carefully carve a shallow recess for the plate to sit flush. Fill old screw holes with wood filler or toothpicks and wood glue so new screws have a solid grip. Drill new pilot holes if the screw holes don’t align. Always drill small pilot holes first to avoid splitting the wood.
Problem: Holes are stripped or misaligned. This happens when the screws spin but don’t tighten, or the knob feels loose after installation.
Fixes:
Wood filler: Fill in the old holes with wood filler, let it dry completely, then drill new pilot holes.
Toothpicks trick: Jam some toothpicks into the hole with wood glue, snap them flush, and screw into them for a tighter fit.
Longer screws: Sometimes switching to longer screws (especially in hinges or strike plates) will help you anchor into the door frame more securely.
Extra Tips
Don’t be afraid to bring your old hardware to the store with you. It helps compare sizes on the spot.
If you’re dealing with a very old or non-standard door, you can buy an adjustable or "retrofit" hardware set made for these situations.
A small wood chisel and a bit of sandpaper are your best friends for cleaning up mortises or adjusting fit.
When It’s Worth Starting Fresh
If you’ve patched the door a few times and it’s looking rough—or if nothing seems to line up anymore—you might consider replacing the slab or having a new pre-drilled door installed. But for most folks, a little patching and adjusting is all you need!
Changing your door hardware and hinges is one of those small upgrades that makes a big impact. It’s a great project to build your DIY confidence, and once you’ve done one door—you’ll be flying through the rest of the house. So grab your screwdriver, take your time, and enjoy that satisfying click of a brand-new latch.
