TIPS & TRICKS

Types of caulk and when to use them

Learn all about caulk and how to choose the best type for your next DIY.

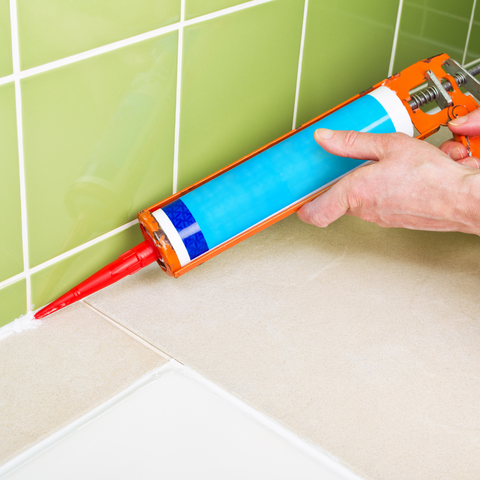
Caulking not only works to give a finished project a professional finish, it also has an important purpose in sealing out moisture and air from leaking through any gaps and cracks in your home.

It can be an intimidating task for many DIYers but before you go calling a plumber about that leaky sink, let’s go through a quick rundown on the different types of caulk and when to use them because as long as you’re equipped with the right materials, caulking is a very doable DIY project!

What is caulk?

Generally speaking, caulk is any kind of waterproof material that seals gaps and cracks between materials to stop nuisances like pests, water and drafts from slipping through. Depending on the type of caulk, it can be used on projects ranging from the smallest molding joints in an accent wall all the way to securing roofing materials.

Types of caulk

Silicone

The all-rounder of caulk. This all-purpose type is a go-to choice for sealing bathtubs, sinks, windows and toilets, and it usually dries clear. It is the most resistant to mold and mildew but it can’t be painted, so keep that in mind!

Acrylic latex

The most beginner-friendly caulk, this type is easy to work with, can be painted over, and works best for filling gaps in molding and trim. This type of caulk is sometimes also called latex caulk, and is best to use with drywall, wood and masonry.

Polyurethane 

The heavy duty cousin of acrylic, polyurethane caulk is typically used in projects that really need to test durability like outdoor concrete and masonry projects. This type of caulk can be painted over. 

Hybrid

Typically the most expensive caulk because it marries both flexibility and durability, it can be used both indoors and outdoors and has the best adhesion of all the types. This type of caulk can be used almost anywhere other caulks are used.

How do I use caulk?

To use a caulking gun, snip off the very tip of the caulk tube and insert it into the opening of the caulk gun, then use the trigger to dispense the caulk.

Use a caulk finishing tool to smooth the bead of caulk after application and read the directions on the label to determine how long it needs to dry if painting over it.

No tool? No problem! Just use your finger dipped in water.

Tip: it’s much easier to make a very small opening at the tip of the caulk and cut off more if needed than to cut off too much to start with!

Now that you’ve got the basics down, you're ready to DIY! Check out our caulking guide for more support.

Supplies to help you do it yourself.

Read more stories like this one.

Why You Should Add Blackout Curtains To Your Windows
TIPS & TRICKS

Why You Should Add Blackout Curtains To Your Windows

A Complete Guide To Changing Your Bathroom Faucet
TIPS & TRICKS

A Complete Guide To Changing Your Bathroom Faucet

Everything You Need To Know Before You Mount Your TV
TIPS & TRICKS

Everything You Need To Know Before You Mount Your TV

Top 3 Common Mistakes When Installing a Showerhead and How to Avoid Them
TIPS & TRICKS

Top 3 Common Mistakes When Installing a Showerhead and How to Avoid Them

Browse Stories