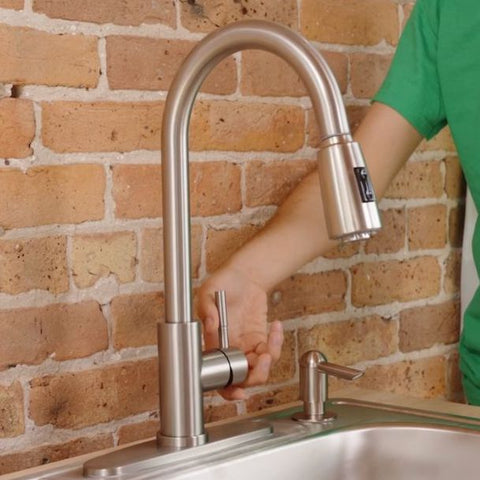
You might think replacing your sink faucet is a task only for a professional, but with the right tools and a little guidance, it’s something you can do yourself. Anything with plumbing can certainly be intimidating — no one wants to mess up when it comes to water in your home — but changing a faucet is easier than you might think. Whether you’re looking to upgrade an older fixture for something more your style, fixing a leak, or just looking for something that works a little better for your bathroom, replacing your sink faucet can be a rewarding DIY home improvement project.
Before You Begin: What to Look for and Prepare
Before turning off the water or disconnecting anything, take inventory of your current faucet and plumbing. First, check your sink’s faucet compatibility. Measure the distance between handles and note the number of holes in your sink.
Note: The steps will be slightly different for a single-handle faucet or a two-handle faucet.
Next, inspect your plumbing. Locate the shutoff valve under your sink. Also called an angle stop or water supply valve, it is a small metal valve that controls the water flow to your faucet. It’s usually located under the sink, where the water supply pipes come through the wall or floor — either at the back wall or the bottom of the cabinet under your sink. It’s typically a small, round or oval knob or a short lever attached to a pipe. Ensure these valves are in good condition.
Finally, figure out your water lines. This would be the time to replace any supply lines, if they are showing wear and tear. If not, you’re ready to shop for your faucet.
Choosing the Right Faucet
It can be overwhelming when you step into a home improvement store in search of a new faucet. Consider the different types of faucets:
Widespread Faucet (Best for Bathroom Vanities)
A widespread faucet has three separate pieces: two handles (hot and cold) and a spout. The handles are not attached to the spout, allowing for a customizable installation. They are typically designed for sinks with 6 to 16 inches between the holes.
Center-set Faucet (Great for Small Spaces)
A center-set faucet combines the spout and handles into a single, compact unit, making it a popular choice for small sinks and vanities. These fit sinks with 4-inch hole spacing, and come as a single piece with two handles or a single-handle design.
Single-Handle Faucet (Best for Kitchens)
A single-handle faucet combines the spout and handle into one streamlined unit. It requires only one hole in the sink or countertop, making it a sleek and space-efficient choice. It requires just one hole for installation, however, some models include an escutcheon plate to cover extra holes from an old faucet.
Material and Finishes
Once you know what kind of faucet you need, consider the material and finish options. Depending on your bathroom style, you can select chrome, brushed nickel, matte black, brass or other.
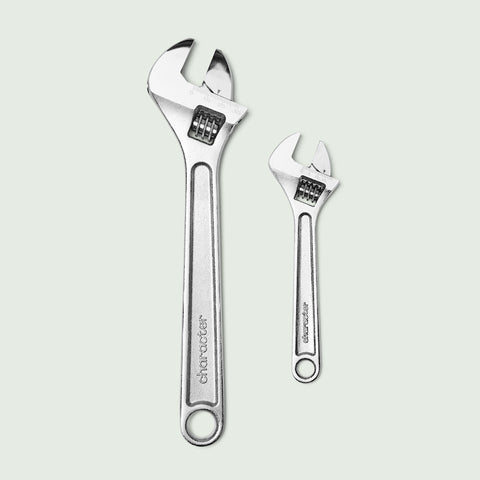
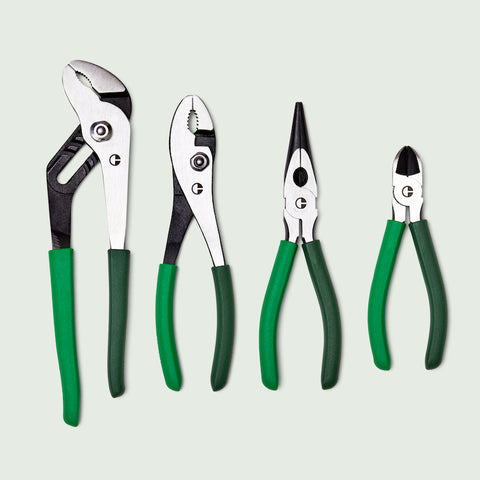
Tools & Materials You'll Need

Our Character Faucet Kit comes with everything you need to get this job done, including:
Basin wrench
Plumber's putty
Thread seal tape
Microfiber rags
Wet wipes pack
Drip Tray
You may also need:
Screwdriver
Adjustable wrench
Flashlight
Step-by-Step Tutorial: How to Replace a Widespread Bathroom Faucet
When completing any project, always adhere to the manufacturer's installation and safety guidelines for any products or tools you use.
Pro Tip: If you need extra support at any step, we’re here for you! Text our pros at (762) 349-0349.
Shut Off the Water & Prep the Area
Begin by turning off both the hot and cold water valves under your sink. Newer homes have push valves, while older homes will have levers to twist. If you don’t have shutoff valves, you may need to turn off your home’s main water supply. You’ll want to have the drip tray ready or a towel to catch any excess water. Next, disconnect the water supply line from your current faucet. You may be able to twist them, but if you’re having a hard time (as in older houses that haven’t been touched recently), try using an adjustable wrench to turn the nuts where the supply lines connect to the shutoff valves.
Remove the Old Faucet
Now that the water supply to this sink is off, disconnecting the faucet will not result in a mess. Begin by unscrewing the nut under the sink that holds the drain in place. Lift out the old drain and remove any remaining plumber’s putty from the sink hole. Next,lLoosen the mounting nuts holding the faucet in place. You’ll find these underneath the sink — use the basin wrench if they are in a tight spot. Once the nuts are removed, carefully pull out the old faucet, handles, and spout from the top of the sink. Use a rag and mild cleaner to wipe away any old putty, mineral buildup, or debris.
Install the New Faucet Handles
Say hello to your new faucet and prep it for installation. Check any instructions from the manufacturer before you begin. Insert the hot and cold handles into the corresponding holes in the sink. Most widespread faucets have labeled handles (H for hot, C for cold). If they are not labeled, hot water goes on the left, cold water on the right. You’ll secure them underneath by sliding the rubber gasket and metal washer onto the threaded pipe. Then, tighten the mounting nut by hand, then use a wrench for a snug fit — but be sure not to overtighten. Some widespread faucets require flexible hoses to connect the handles to the spout.
Install the Spout
To add the spout, insert it into the center hole of the sink and secure it from underneath using the washer and mounting nut. Before tightening everything down, double-check the spout is centered.
Install the Drain
Some faucets come with a matching drain. If yours does not, you can buy it sseparatelt or just keep your existing drain if it matches with the same material and finish as your new faucet. To install the new drain, apply plumber’s putty around the underside of the drain flange: the top part of the drain that sits in the sink). Insert the drain into the sink hole and press down firmly. Secure the drain from below by tightening the locking nut. Attach the drain tailpiece and connect it to the P-trap under the sink. Insert the pop-up stopper (if your faucet includes one) and connect the lift rod to operate it.
Connect the Water Supply Lines
Now that your new faucet is attached, it’s time to reconnect the water supply lines. Attach the flexible water supply lines to the hot and cold shutoff valves. Then connect the other end of the supply lines to the corresponding faucet handles. Use plumber’s tape on the threads to prevent leaks before tightening the connections.
Turn On the Water & Test for Leaks
You’re almost done! Slowly turn the water supply valves to allow water to flow. Keep your drip tray in place to catch any leaks. Tighten connections where you see any leaking water. Once the water has been fully turned back on, run the faucet to make sure everything is working properly. You did it!
Common Mistakes When Replacing A Faucet & How to Avoid Them
Mistakes happen, but with a little planning and close attention to detail, you can avoid anything getting out of hand.
Mistake: Forgetting to shut off the water
Fix: Always turn off the hot and cold shutoff valves under the sink before starting. If you don’t have shutoff valves, turn off your home’s main water supply.
Mistake: Not using plumber’s tape on threaded connections
Fix: Wrap plumber’s tape around the threads of the water supply line connections to prevent leaks. This helps create a watertight seal. You may think you don’t need it — but you do!
Mistake: Over-tightening nuts and connections
Fix: Tighten connections snugly but avoid using excessive force, which can crack fittings or damage plumbing components.
Mistake: Ignoring small leaks after installation
Fix: If you see drips, slightly tighten the connections or apply more plumber’s tape. Running the faucet and checking under the sink for leaks right away can save bigger issues later.
Congratulations on installing your new sink faucet! You can now add this valuable skill to your DIY repertoire and tackle other sinks in your home like a pro. Tag us in your sink updates on Instagram at @character.home.